That’s why we’ve launched the new Documents Folder feature. Now, you can easily organise your documents into custom folders, making it faster to find what you’re looking for and keeping your documents section neat and tidy.
No more clutter. Just simple, efficient document management!
Follow these easy steps to create a folder, move documents into your folder and share them with others.
Step 1: Go to the “My Documents” section on the left hand side of the navigation panel.
To create a folder, go to the “My Documents” section of the navigation panel, and click “+ New Folder”

Step 2: Enter a folder name and click “Create”

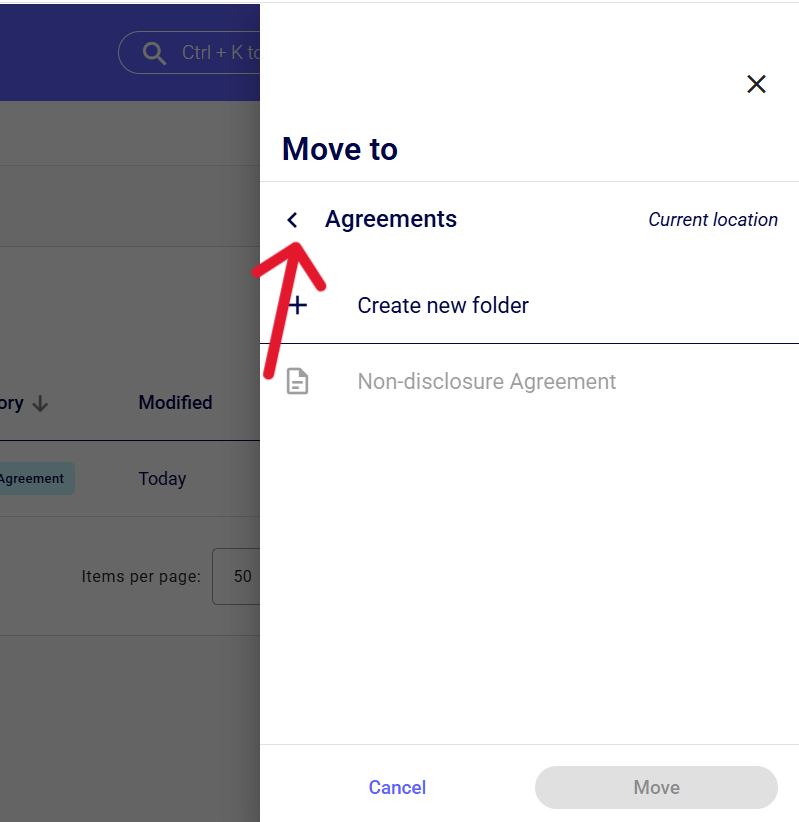
Step 3: Start moving documents into your folder by clicking on the three dots (a.k.a kebab icon) next to the specific document, and click “move”

Step 4: Next, move the document into the folder by clicking on the folder you just created, then click “move”.


💡 You can follow the same steps to move other documents into your already created folder.
You can share a folder with someone or a group by clicking the “share” icon.


You can also remove documents from your folder by opening the folder, clicking the three dots next to the specific document you want to remove, and clicking “move”.

Click on the little “back page” icon close to the folder name, and click “move”, and then the document will be removed from the folder.

💡You can also delete or rename a folder by clicking on the three dots next to the folder, and click “Delete” or “Rename”

💡You can organise your documents, and any document you upload- here's how.
If you have further questions or need further assistance. Please feel free to reach out to our Support Team on live chat, and they will be happy to help.